Do you need to add new lists or libraries to your Meeting Workspace site, such as sales contacts or pictures of your product launch? Or perhaps you want to change the way your Meeting Workspace site is organized? You can customize a Meeting Workspace site in many different ways to make your meetings more productive.
You must have the Design permission in the Meeting Workspace site to change its appearance or to add and remove lists or libraries. For more information, see your site owner or administrator.
Note
The lists and libraries in a Meeting Workspace site are contained in Web Parts, which are the building blocks of a Web Part Page in Microsoft Windows SharePoint Services 3.0. Most Help topics about Web Parts
and Web Part Pages in sites also apply to a Meeting Workspace site.
What do you want to do?
 Add a commonly used list or library to a Meeting Workspace site
Add any list or library to a Meeting Workspace site
Remove the view of a list or library in a Meeting Workspace site
Restore the view of a list or library in a Meeting Workspace site
Delete a list or library from a Meeting Workspace site
Change the layout of a Meeting Workspace site
Change the site settings of a Meeting Workspace site
Share lists or library items for multiple or recurring meetings
Add a commonly used list or library to a Meeting Workspace site
A Meeting Workspace site is created by using special types of Web pages called Web Part Pages. Commonly used lists and libraries appear in the Add Web Parts
task pane, where you can add them quickly with their default settings to your Meeting Workspace site.
To see all lists and libraries, or to work with custom lists, see Add any list or library to a Meeting Workspace site.
- On the Site Actions menu
 , click Edit Page.
 - In the Add Web Parts
task pane, under Web Parts, select the type of list or library that you want to add.
- At the bottom of the Add Web Parts
task pane, in the Add to list, click the location where you want to put your list or library in the Meeting Workspace site. For example, you might want to put a list in the right column.
- Click Add.
- Repeat steps 2 through 4 to add more lists or libraries to your Meeting Workspace site.
- In the upper-right part of the Web Part Page, click Exit Edit Mode.
Tip If you prefer, you can drag items to your page from the Add Web Parts
task pane.
 Top of Page
Add any list or library to a Meeting Workspace site
Use this procedure to choose from all available lists or libraries, including custom lists, or to specify the title, description, and some of the settings for your lists or libraries as you create them.
- On the Site Actions menu , click Edit Page.
- In the lower part of the Add Web Parts
task pane, click Show All Lists.
- Click the list or library that you want to add to the Meeting Workspace site.
- Enter a name and description and any other settings that you want. Some settings vary among the lists or libraries.
- Click Create. When you create a survey, you will be prompted to enter the survey questions and click Next until you are finished.
- To return to your Meeting Workspace site, click its name in the top navigation.
Top of PageRemove the view of a list or library in a Meeting Workspace site
You can remove the view of a list or library in a Meeting Workspace site, so that the list or library is not displayed on the site. This procedure removes the Web Part that contains the list or library, but it doesn't actually delete the list or library, or its contents. You can restore the list or library later.
- On the Site Actions menu , click Edit Page.
- In the Web Part Page, click the arrow next to the title of the list or library that you want to remove from view.

- In the Web Part Menu that appears, click Delete.
- If a message about deleting the Web Part appears, click OK.
- In the upper-right part of the Web Part Page, click Exit Edit Mode.
Top of PageRestore the view of a list or library in a Meeting Workspace site
This procedure restores the view of a list or library and its contents in a Meeting Workspace site, if you removed the Web Part that contained the list or library.
- On the Site Actions menu , click Edit Page.
- In the layout area of the Web Part Page, in the section or zone
of the page where you want to restore the list or library — Left, Center, or Right — click Add a Web Part.
- In the Add Web Parts dialog box, under Lists and Libraries, select the check box of the list or library that you want to display on the site again.
- Click Add.
- In the upper-right part of the Web Part Page, click Exit Edit Mode.
Top of PageDelete a list or library from a Meeting Workspace site
This procedure deletes a list or library and its contents from a Meeting Workspace site. You can create a new list or library of the same type later, but the contents of the original list or library will not be available.
Open the page that contains the list or library, and then click the name of the list or library to open it.
If the list or library is already open, skip to step 2.
- Click Settings, and then click List Settings or settings for the type of library you are deleting. For example, in a document library, click Document Library Settings.
- Under Permissions and Management, click Delete this list or Delete this type of library, such as Delete this document library.
- To return to your Meeting Workspace site, click its name in the top navigation.
Top of PageChange the layout of a Meeting Workspace site
In edit mode, you can rearrange lists and libraries by dragging them to different areas, or zones, in the Web Part Page.
You can also change the appearance and behavior of specific Web Parts, such as whether people can resize them and whether they have frames around them.
- On the Site Actions menu , click Edit Page.
- In the Web Part Page, point to the title of a list or library until the pointer becomes a four-headed arrow.
- Click and drag the list or library
to change its position in the layout.
- To make changes to the appearance or the layout, or to make other advanced changes to a list or library, click the arrow to the right of the list's title or library's title to display the Web Part Menu.
- Click Modify Shared Web Part.
- In the List Views
task pane, make the changes that you want.
- Do one of the following:
- Click Apply to view the changes individually. When you are finished, in the upper-right part of the Web Part Page, click Exit Edit Mode.
- Click OK to accept all changes and return to your Meeting Workspace site.
Top of PageChange the site settings of a Meeting Workspace site
If you have permissions to change the site settings, if you are the meeting organizer, or if you were added to the site as an owner, you can change the settings for the Meeting Workspace site. For example, you can change the site's theme or specify templates to use with a document library. The process is similar to changing the settings for any site.
- On the Site Actions menu , click Site Settings.
Note
On a site for which the Site Actions menu is customized, point to Site Settings, and then click the settings that you want to view.
- Change or view the settings that you want.
- Depending on the settings that you are changing, you may see an OK, Apply, or Finish button to click when you are finished.
- To return to your Meeting Workspace site, click its name in the top navigation.
Notes
- If you set up the meeting from an e-mail program, you cannot change the meeting date, time, or location from the Meeting Workspace site. You must use the application
that you used to schedule the meeting.
- Your administrator may have set additional restrictions on the settings that you can change. For more information, see your administrator.
Top of PageShare lists or library items for multiple or recurring meetings
This procedure applies to a Meeting Workspace site for a series of meetings — either a recurring meeting or multiple related meetings that aren't part of the same recurring meeting series.

 The home page and an additional page are displayed for this meeting date.
 Only the home page is displayed for this meeting date.
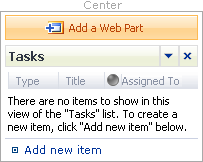
 The Tasks Web Part is displayed on the home page for both meeting dates, but the items in the list or library are specific to each date.
The lists and libraries that are already on the home page of the Meeting Workspace site and any new lists and libraries that you add to the home page
are displayed for every meeting.
By default, the items that you add to the lists and libraries are displayed only when you are viewing the meeting where the items were added. If you want the items to appear for all meetings, you can use the following procedure to enable the list or library to share items across all meetings.
- On the Site Actions menu , click Site Settings.
Note
On a site for which the Site Actions menu is customized, point to Site Settings, and then click the settings that you want to view.
- Under Site Administration, click Site libraries and lists.
- Click the Customize "list or library" link for the list or library that you want to share across meetings.
- Under General Settings, click Advanced settings.
- Next to Share List Items Across All Meetings (Series Items), click Yes. You may need to scroll to see this option.
Note
You can add pages to the Meeting Workspace site to organize the content. When you add a page, you choose whether the new page appears for all the meetings or only the meeting that is currently selected. You can change how a page appears by managing the settings for the page.
Top of Page